Rather than haphazardly leaving your loft contents sprawled across the floor, dreading the time you need to go up and retrieve it. Utilise smart loft storage shelves to help organise belongings so you can quickly and easily access them without worrying about hazards.
At LoftZone, we offer two variations of innovative loft shelving; the Steel TrussShelf and our Wooden Shelf-Beams. Each work similarly, going between the trusses in your loft (the ‘V’ made of two timber supports) but can offer different storage options depending on the available space.
Once you’ve decided which type is the best for your needs, you must understand how to install loft shelves. Both are extremely easy to fit, and today, we’ll ensure you have everything you need to do so confidently.
What are Metal Loft Truss Shelves
The Metal Truss Shelf uses smart steel panels that fit between the timber trusses, finding their own height depending on the width the trusses are apart. Once rested correctly, secure the panels in place with the screws provided. Everything you need to install our steel truss shelves is provided with your order meaning you can fit it in a matter of minutes.
Each shelf panel is 600×610 making them perfectly sized to go between the space of a standard home’s loft truss. Weighing 3.7kg, they are super lightweight but still offer an incredibly strong platform for your belongings to rest on, able to hold 12kg per shelf.
How to Install Metal Loft Truss Shelves
- Start at the left-hand end of your row of shelves and place your shelf end-piece so it rests on the trusses, screwing it into place.
- Rest the first TrussShelf panel’s left-hand end on the End-Piece and its right-hand end on the trusses.
- Place each of the other TrussShelf panels, with each panel resting on the previous panel.
- Screw the panels to the trusses and then screw each panel to the one next to it.
Download our full instruction guide for the Truss Shelves.
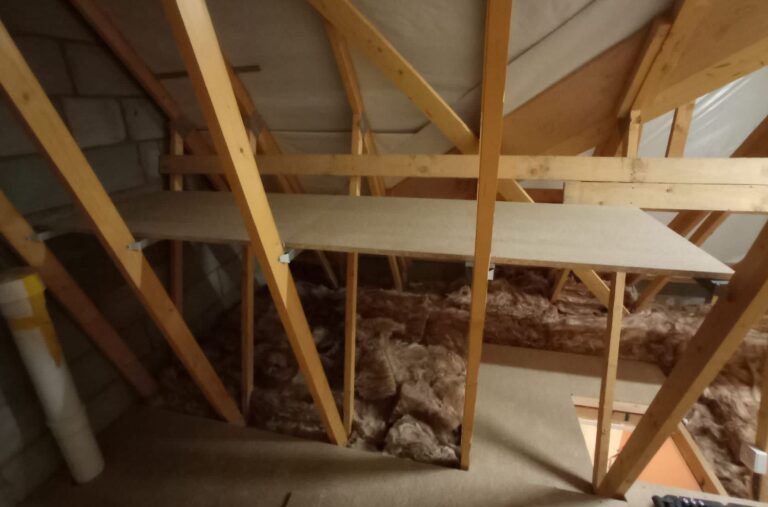
What are Wooden Loft Shelf-Beams
Our Loft beams work similarly but instead are wooden loft shelves that sit on two narrow metal supports with two brackets on either side fitting into the timber trusses. Instead of being limited to truss fittings that are 600mm apart, the brackets fit to each individual truss allowing you to create shelves at the length of your liking rather than being limited to that size. While 600mm is the standard spacing found in most UK houses since the 1990s, this option is ideal for circumstances where this isn’t the case.
The metal support beam comes in two sizes: 700mm and 375mm, so you can place them at two different heights on the truss or use both to have two rows of shelving. They weigh 650g and 350g, respectively, but both are designed to hold up to 12kg of stored possessions, the same as the metal truss shelf, assuming you use our loft boards as the shelving material. You can use your loft board instead, but be wary that this may affect the bearing weight.
How to Install Wooden Loft Shelf-Beams
- Slide a bracket into each end of a Shelf-Beam, by compressing the flanges together and pushing it in until it reaches the end stop.
- Place the Shelf-Beam in the ‘V’ made of two truss webs so that each bracket of the Shelf-Beam rests on a truss web.
- Ensure the Shelf-Beam is level before fastening the brackets in place with four of the screws provided.
- Place the shelf boards on the Shelf-Beams with each end approximately halfway across a beam, fastening them in place with the screws provided.
Download our full instruction guide for the Wooden Shelf Beams here.
You should now have a good understanding of the difference between our two loft shelf options and how to fit them effectively. If you have any questions, call us on 01483 366667 or email the team, and we’ll gladly help discuss your situation so you can make an informed decision based on your needs.