
A loft conversion is one of the most valuable improvements you can make to your home.
It’s also one people assume needs a full team of tradespeople from day one. That isn’t always true.
Some parts of a DIY loft conversion are genuinely within reach for a confident, careful homeowner. Other parts legally and structurally need a professional. This guide walks through both, so you know exactly where that line sits before you start.
Quick summary
- A DIY loft conversion can save you money, but only on the parts you’re qualified and legally able to do yourself.
- Structural work, electrics, and plumbing almost always need a certified professional.
- Boarding, insulation checks, and finishing work are realistic DIY territory.
- Building regulations apply to loft conversions, DIY or not.
- Costs vary widely depending on how much of the work you take on yourself.
What Is a DIY Loft Conversion?
A DIY loft conversion is a project where the homeowner takes on some or all of the work themselves, rather than handing the entire job to a contractor.
In practice, most successful DIY conversions are a mix. The homeowner handles boarding, insulation, decorating, and fitting out. A qualified professional handles structural changes, electrics, and anything covered by building regulations.
Calling it “do it yourself” doesn’t mean doing every single stage alone. It means taking control of the parts you can manage safely and legally, and knowing when to bring in help.
Benefits of a DIY Loft Conversion
Cost Savings
Labour is usually the largest cost in any loft conversion. Taking on stages like boarding, insulation, and decorating yourself removes a chunk of that labour cost.
A cheap loft conversion isn’t about cutting corners. It’s about being selective over where your money goes, paying for expertise where it’s legally required, and doing the rest yourself.
Personalisation
When you’re hands on with the work, you control every detail. The exact layout of your storage. The finish on the walls. Where the sockets go.
Contractors work to a brief. When you do it yourself, the brief is whatever you decide, as you go.
Learning Experience
There’s a practical education that comes from doing physical building work on your own home.
You learn how your house is actually built, not just how it looks. That knowledge tends to make you better prepared for the next project, whatever it turns out to be.
Do It Yourself Attic Conversion: Is It Right for You?
Assessing Your Skills
Be honest about this before you start. Boarding a floor and painting walls is very different from cutting into roof structures or rewiring a circuit.
If you’ve never worked with power tools, don’t know how to read a spirit level properly, or aren’t confident around basic carpentry, start smaller. A do it yourself attic conversion rewards realistic self assessment far more than optimism.
Evaluating Your Loft Space
Not every loft is suitable for conversion, DIY or otherwise. Head height, roof structure, and joist strength all affect what’s possible.
Before planning anything, check:
- Minimum head height, usually around 2.2 metres at the highest point.
- The type of roof structure, trussed or traditional cut roof.
- Existing joist size and spacing, which determines whether they can take additional load.
These details decide what kind of conversion, if any, your loft can support.
Considerations for Safety and Regulations
Loft conversions fall under building regulations in the UK, regardless of whether you use a contractor or do the work yourself.
Structural changes, fire safety measures, and electrical work all need to meet specific standards, and some elements legally require certified professionals to sign off. Skipping this isn’t a shortcut. It’s a risk to your safety and to any future sale of the property.
Planning Your Loft Conversion
Identifying the Type of Loft Conversion
The main types are:
- Roof light conversion, the simplest, using existing roof space with roof windows.
- Dormer conversion, adding a box shaped extension to increase head height and floor space.
- Hip to gable conversion, extending a sloped side wall to create a more usable shape.
- Mansard conversion, altering the roof structure entirely for maximum space.
The simpler the type, the more realistic it is as a do it yourself loft conversion. Roof light conversions involve the least structural change.
Budgeting for a Basic Loft Conversion
Costs depend heavily on conversion type, loft size, and how much you take on yourself. As a general guide:
- A roof light conversion tends to sit at the lower end of the cost scale.
- Dormer and hip to gable conversions cost more due to the structural work involved.
- Mansard conversions are usually the most expensive, given the scale of the roof alteration.
Get quotes for the professional stages first. That gives you a realistic baseline before deciding what you can take on yourself.
Essential Attic Conversion Ideas UK Homeowners Should Consider
Think about function before finish. Common uses include a home office, guest bedroom, or additional storage.
UK lofts often have restricted head height compared to other conversion types, so plan furniture and layout around the areas with the most headroom, usually the centre of the room under the ridge.
Step-by-Step Process of Converting a Loft DIY
Step 1: Planning and Permissions
Check whether your loft conversion needs planning permission, or falls under permitted development rights. Confirm building regulations approval separately, since this applies regardless of planning permission status.
Step 2: Preparing the Loft Space
Clear the loft completely. Assess the existing structure, insulation, and any services already running through the space, such as pipework or cabling.
Step 3: Structural Improvements
This is the stage that almost always needs a structural engineer and qualified tradespeople. Strengthening joists, altering roof structure, or adding steel supports are not DIY tasks.
Step 4: Insulation and Ventilation
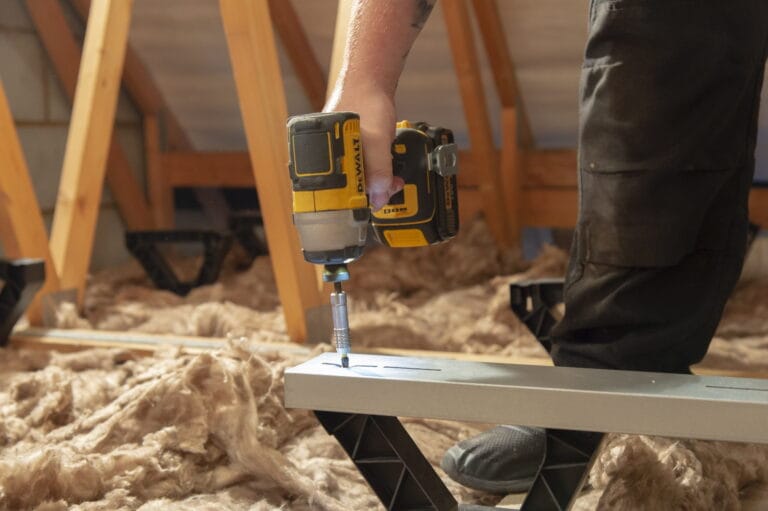
Insulation needs to be fitted without being compressed, and ventilation needs to be maintained to prevent condensation and damp. A raised floor system that sits above the insulation, rather than compressing it, protects both the insulation’s performance and the airflow beneath it.
Step 5: Flooring and Wall Construction
Once insulation is in place, a raised, load bearing floor system can go down. This is one of the more realistic DIY stages, provided you follow the joist spacing and load guidance for your specific loft.
Step 6: Electrical and Plumbing Setup
Any electrical work must be carried out or certified by a qualified electrician to meet Part P building regulations. The same applies to plumbing if you’re adding a bathroom or radiators.
Step 7: Finishing Touches
Plastering, painting, flooring finishes, and fitting out storage or furniture. This is where most of the personalisation happens, and where DIY effort has the most visible impact.
Common Challenges in DIY Loft Conversions
Underestimating Time and Effort
Loft conversions almost always take longer than first expected, particularly when working around a day job or other commitments. Build in more time than you think you’ll need.
Navigating Building Regulations
Building regulations aren’t optional extras. They cover structural safety, fire escape routes, insulation standards, and more. Get clarity on what applies to your project before you start any work.
Overcoming Structural Limitations
Not every loft can support every type of conversion. Low head height, weak joists, or unusual roof shapes can limit your options, and no amount of DIY effort changes what the structure can safely support.
DIY Loft Conversion Cost Breakdown
Rough cost ranges, depending on conversion type and how much work you take on yourself:
- Roof light conversion: the most affordable option, particularly with DIY boarding, insulation, and finishing.
- Dormer conversion: mid range, with structural work forming the bulk of the professional cost.
- Hip to gable conversion: similar to dormer, with added cost for the wall extension.
- Mansard conversion: the highest cost, due to the scale of roof alteration required.
In every case, DIY savings come from the finishing stages, not the structural ones.
Conclusion: Is a DIY Loft Conversion the Right Choice for You?
A DIY loft conversion works best as a partnership. You take on the stages you’re genuinely equipped to handle, and you bring in professionals for the structural, electrical, and regulated work.
Approached that way, a cheap loft conversion doesn’t mean a compromised one. It means spending your budget where it counts, and your effort where it’s safe to give it.
Get in touch with LoftZone to find out how a raised boarding system can support the DIY stages of your loft conversion, safely and properly.